Arduino.cc 去年發表了 MKR1000 這片 IoT 開發板之後,於近日發表了在 IDE 上的重大進展,就是 Arduino Cloud,雖然很多東西都還在 beta 就是了… 其實CAVEDU 在兩年前就已經使用 Arduino Yun 搭配 Temboo 來結合各種雲服務,例如 Gmail、Google 試算表、Facebook 與 Dropbox 等等,直到今天聽到 Arduino 終於有自己的 Cloud 也是夠令人興奮的了。
另一方面,MIT App Inventor 也選用 Arduino 101 作為物聯網套件的核心開發板,您在不同的面向上都有相當好的方案可以選擇。您可以直接從 Arduino project hub 看看目前有哪些有趣的專案
說真的,從 Arduino Yun 之後,經過 LinkIt Smart 7688 到這篇的 MKR1000 (點進去自己看規格吧),各位是否發現這個現象了呢?
延伸閱讀:[Make雜誌] Arduino發表MKR1000、物聯網程式開發環境和社群專題平臺
板子的規格愈來愈不是討論的重點,反正它們一定是愈來愈快,愈來愈好
雲端/後端的完整性才能帶起更多應用

請點我開啟 Arduino Cloud,需要註冊一個 Arduino 帳號。完成會看到以下畫面。從這張圖來看,Arduino.cc 和 Temboo 總算是喬好了。


接著是 Arduino Cloud 的 Getting Started 頁面

會詢問您要使用哪一種方式來聯網,您可以選擇 MKR1000 或 一般的 Arduino 開發板搭配 Wifi 擴充板

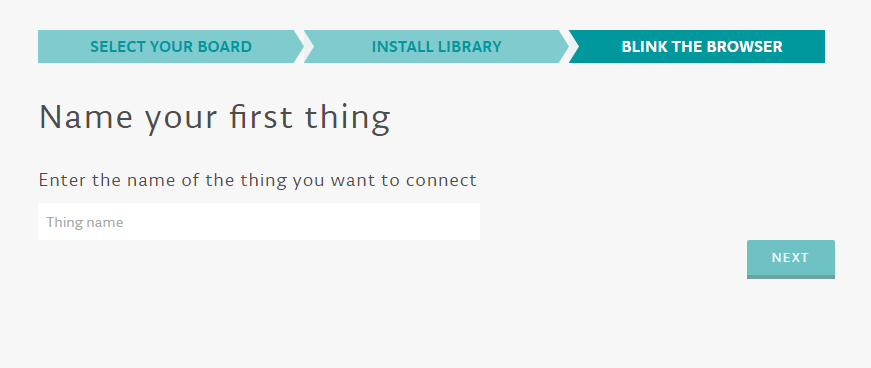
接著要為用來聯網的虛擬裝置取一個名字,在此的概念與 MediaTek Cloud SandBox 的 test device 是類似的
完成之後就可以看到在這個裝置 (cavedu)
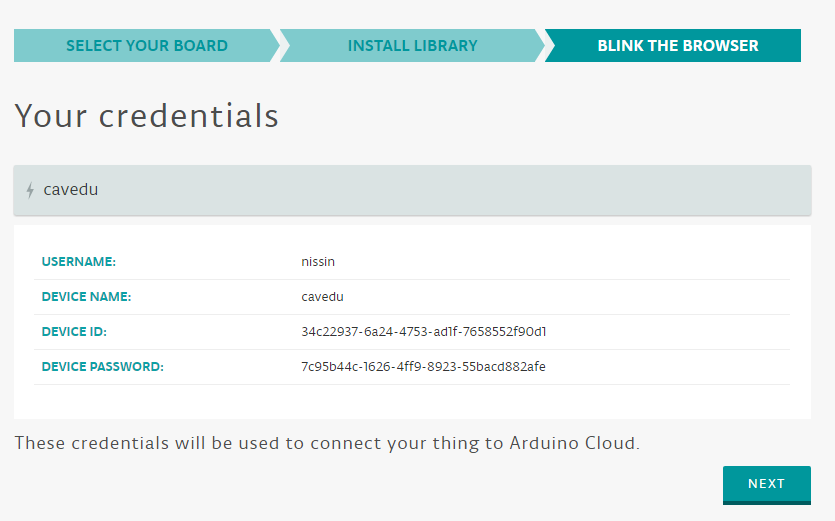
自動產生出來的程式碼,請填入device ID . device password 就可以了。本範例會每隔一秒隊指定帳號 (nissin) 下的某個裝置 (cavedu )發送一次相關訊息 (走 mqtt)
client.publish(“/nissin/cavedu/blink”, “on”); )
另一方面如果 Arduino 接收到來自雲端的訊息,也會把它顯示在 Serial Monitor 中
void messageReceived(String topic, String payload, char * bytes, unsigned int length) {
Serial.print(“incoming: “);
Serial.print(topic);
Serial.print(” – “);
Serial.print(payload);
Serial.println();
}
完整程式碼如下
// Include libraries

#include <SPI.h>

#include <WiFi101.h>

#include <WiFiSSLClient.h>

#include <MQTTClient.h>


// Your local WiFi settings

const char ssid[]       = ""; // your network SSID (name)

const char pass[]       = ""; // your network WPA password


// Arduino Cloud settings and credentials

const char server[]     = "mqtt.arduino.cc";

const char userName[]   = "nissin";

const char deviceName[] = "cavedu";

const char deviceId[]   = "34c22937-6a24-4753-ad1f-7658552f90d1";

const char devicePsw[]  = "7c95b44c-1626-4ff9-8923-55bacd882afe";


int ledPin = LED_BUILTIN; // pin to blink, use the built-in LED


WiFiSSLClient net; // SSL client to use for MQTT connection

MQTTClient client; // MQTT client


void setup() {

  //Initialize serial and wait for port to open:

  Serial.begin(9600);

  while (!Serial) {

    ; // wait for serial port to connect. Needed for native USB port only

  }


  pinMode(ledPin, OUTPUT); // set the LED pin mode


  // check for the presence of the shield:

  if (WiFi.status() == WL_NO_SHIELD) {

    Serial.println("WiFi shield not present");

    while (true);       // don't continue

  }


  // attempt to connect to WiFi network:

  Serial.print("Attempting to connect to WPA SSID: ");

  Serial.println(ssid);


  while (WiFi.begin(ssid, pass) != WL_CONNECTED) {

    // unsuccessful, retry in 4 seconds

    Serial.print("failed ... ");

    delay(4000);

    Serial.print("retrying ... ");

  }


  // configure the MQTT client

  client.begin(server, 8883, net);


  // connect to the MQTT server

  connect();

}


void connect() {

  Serial.println("connecting...");


  // attempt to connect to the MQTT server

  while (!client.connect(deviceName, deviceId, devicePsw)) {

    // connection failed, print '.' and retry

    Serial.print(".");

  }


  Serial.println("connected!");

}


void loop() {

  // let the MQTT client process events

  client.loop();


  // publish an "on" message to the device's blink topic and turn the LED on

  client.publish("/nissin/cavedu/blink", "on");

  Serial.println("publishing on");

  digitalWrite(ledPin, HIGH);

  delay(1000);


  // publish an "off" message to the device's blink topic and turn the LED off

  client.publish("/nissin/cavedu/blink", "off");

  Serial.println("publishing off");

  digitalWrite(ledPin, LOW);

  delay(1000);

}


// incoming message handler, print out the received message

void messageReceived(String topic, String payload, char * bytes, unsigned int length) {

  Serial.print("incoming: ");

  Serial.print(topic);

  Serial.print(" - ");

  Serial.print(payload);

  Serial.println();

}
Post Views: 362


